Cleaning Before Oiling
Remove Old Finish
If there's existing finish, use a gentle wood stripper or sand lightly with fine-grit sandpaper. Remove all dust and debris completely.
Deep Clean Surface
Use a mild soap solution and soft cloth to remove dirt, grease, and grime. For stubborn stains, use a specialized wood cleaner. Rinse thoroughly and allow to dry completely.
Inspect for Damage
Check for cracks, splinters, or loose hardware. Repair any issues before applying oil. Sand rough areas smooth with fine-grit sandpaper.
Final Preparation
Ensure the surface is completely dry and free of dust. Use a tack cloth to remove any remaining particles. The wood should be clean and ready for oil application.
Oil Application Techniques
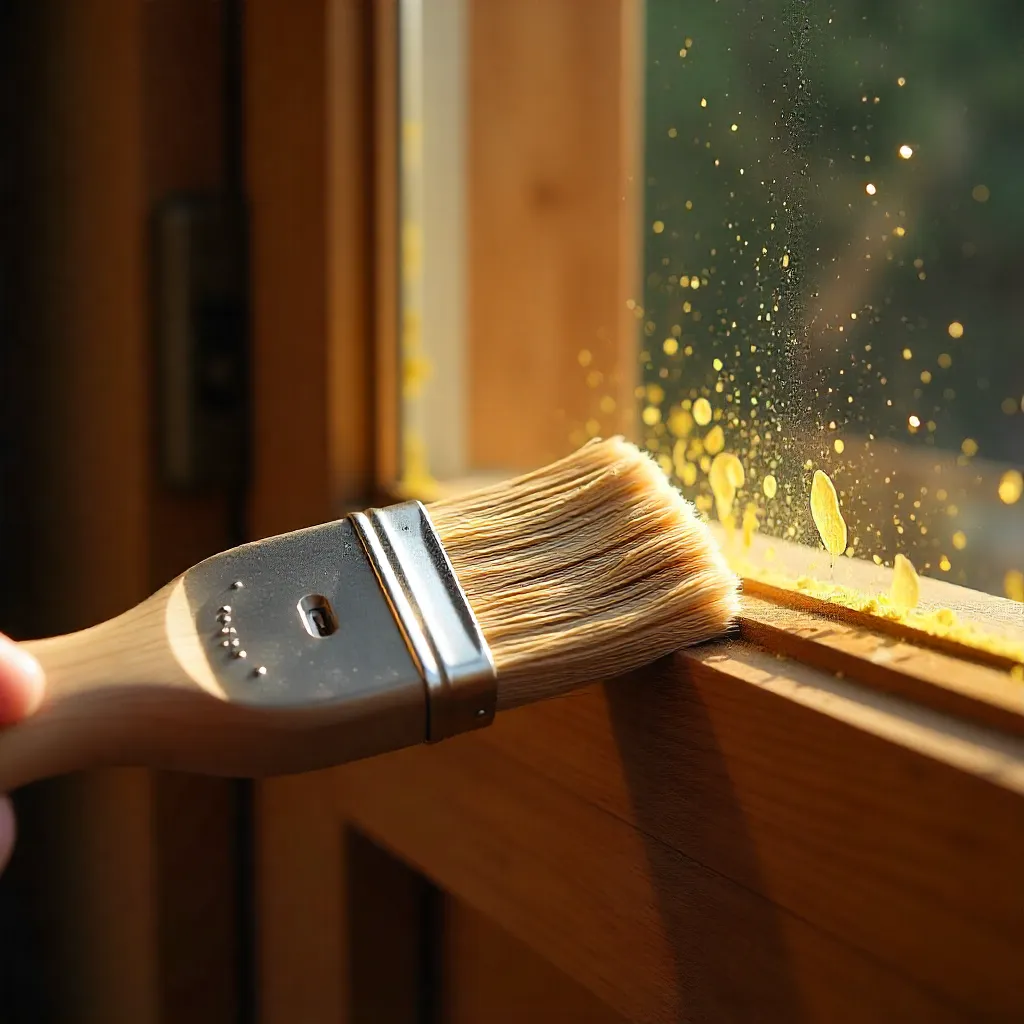
Brush Application Method
Use a natural-bristle brush to apply oil in thin, even coats. Work in the direction of the wood grain, ensuring complete coverage without pooling. This method is ideal for larger surfaces.
Cloth Application Method
For smaller areas or detailed work, use a lint-free cloth. Apply oil in circular motions, then wipe in the direction of the grain. This provides more control and even distribution.
Multiple Coat Application
Apply 2-3 thin coats for optimal protection. Allow each coat to penetrate for 15-30 minutes, then wipe away excess. Wait 24-48 hours between coats for proper drying.
Seasonal Maintenance for Various Weather Conditions
Spring Care
After winter, inspect for any damage or wear. Clean thoroughly and apply a fresh coat of oil if needed. Spring is ideal for maintenance as temperatures are moderate.
- Inspect for winter damage
- Deep clean all surfaces
- Apply protective oil coating
- Check hardware and mechanisms
Summer Care
Protect wood from intense sun and heat. Use UV-protective formulas and ensure adequate ventilation. Monitor for cracking or warping due to heat exposure.
- Apply UV protection formula
- Monitor for heat damage
- Ensure proper ventilation
- Touch up as needed
Fall Preparation
Prepare wood for harsh winter conditions. Apply a weather-resistant finish and check seals. This is crucial for exterior doors and windows facing winter weather.
- Apply weather-resistant coating
- Check and repair seals
- Inspect for gaps or cracks
- Final protective treatment
Winter Maintenance
During winter, minimize exposure to moisture and extreme cold. Keep surfaces clean and dry. Avoid applying oil in freezing temperatures as it won't penetrate properly.
- Keep surfaces dry
- Remove snow and ice promptly
- Monitor for moisture damage
- Plan spring maintenance
Polishing and Buffing Tips
Wait for Proper Drying
Allow the final coat of oil to dry completely, typically 24-48 hours depending on temperature and humidity. The surface should feel dry to the touch.
Light Sanding (Optional)
For an ultra-smooth finish, lightly sand with very fine-grit sandpaper (400+ grit) between coats. This creates a silky-smooth surface.
Buff with Soft Cloth
Use a clean, soft microfiber cloth to buff the surface. Use circular motions followed by long strokes in the grain direction for a beautiful sheen.
Final Inspection
Check for any missed spots or uneven areas. Touch up as needed. The finished surface should have an even, natural appearance.
Safety & Ventilation Advice
Proper Ventilation
Always work in a well-ventilated area. Open windows and doors, or use fans to ensure adequate air circulation. This is especially important when working indoors.
Protective Equipment
While natural oils are safer than synthetic finishes, wear gloves to protect your hands. Use eye protection when sanding, and consider a mask if working in confined spaces.
Fire Safety
Oily rags can spontaneously combust. Store used rags in a metal container with water, or lay them flat to dry completely before disposal. Never leave them bunched up.
Temperature Considerations
Apply oil when temperatures are between 50-80°F (10-27°C) for best results. Avoid application in direct sunlight or freezing conditions.
DIY Application Checklist
Pre-Application Checklist
- Surface is clean and dry
- All old finish removed (if applicable)
- Repairs completed
- Hardware removed or protected
- Adequate ventilation ensured
- Protective equipment ready
- Oil and application tools prepared
- Weather conditions suitable
During Application
- Apply thin, even coats
- Work in grain direction
- Remove excess oil after penetration
- Allow proper drying time between coats
- Maintain consistent application technique
Post-Application
- Final coat completely dry
- Surface buffed and polished
- Hardware reinstalled
- Used materials properly disposed
- Maintenance schedule planned
Need More Guidance?
Contact us for personalized advice or explore our DIY projects section for more detailed instructions.